
If you have had any trouble making a dairy-free crust, I’m here to help. The explanations below are lengthy but I explain what to do and not do when making a gluten-free AND dairy-free pie crust. You can skip straight to my gluten-free, dairy-free pumpkin pie recipe but the details are below.

Your gluten-free, dairy-free crust ingredients
This might sound a bit funny but if you have to eat gluten-free these days, the options are really good. They are certainly much better than 7 years ago when I started in 2007. A few years ago, I felt I had really nailed a recipe for a gluten-free pie crust. It was flakey and tasty. Then we switched to dairy-free and it became more challenging. The crust was tasty but crumbled often so I had to do a lot of repairing. Again, this is my own pie crust recipe.
When Bob’s Red Mill came out with a pie crust mix, I was curious since I was hearing rave reviews. Everyone was saying it was easy to use and produced great results. I wasn’t sure how the dairy-free version would work so I decided to put it to the test.
Thank you to Bob’s for providing me with free samples of the product to do my testing. I’m so glad I was able to make more than one version as it took me a few tries.
GF, DF pie crust shortening combination AKA “the fat.”
For the first test, I used the recipe as is with shortening but, instead of rolling between two pieces of plastic wrap, I rolled on my silicone baking mat (which I have always done in the past) and 1 piece of plastic. The crust fell apart but I was able to piece it back together and make a delicious peach and raspberry pie. My family certainly didn’t mind a bit. When I checked the reviews for the mix, most people had used a combo of butter and shortening (recommended version) instead of all shortening (dairy-free version). At this point, I figured it had to do with the fact that I used all shortening but was determined to make it work.
After talking to a few people, they suggested using coconut oil. Really?! I wasn’t convinced but knew I had to give it a try. So, the next experiment was with a combination of soy-free Earth Balance (soy doesn’t agree with me), organic palm shortening, and coconut oil (I used slightly less coconut oil). Read about dairy-free alternatives here on my blog. I refer to this later in this post as the “fat”.
FIRST MEASURE THE SHORTENING
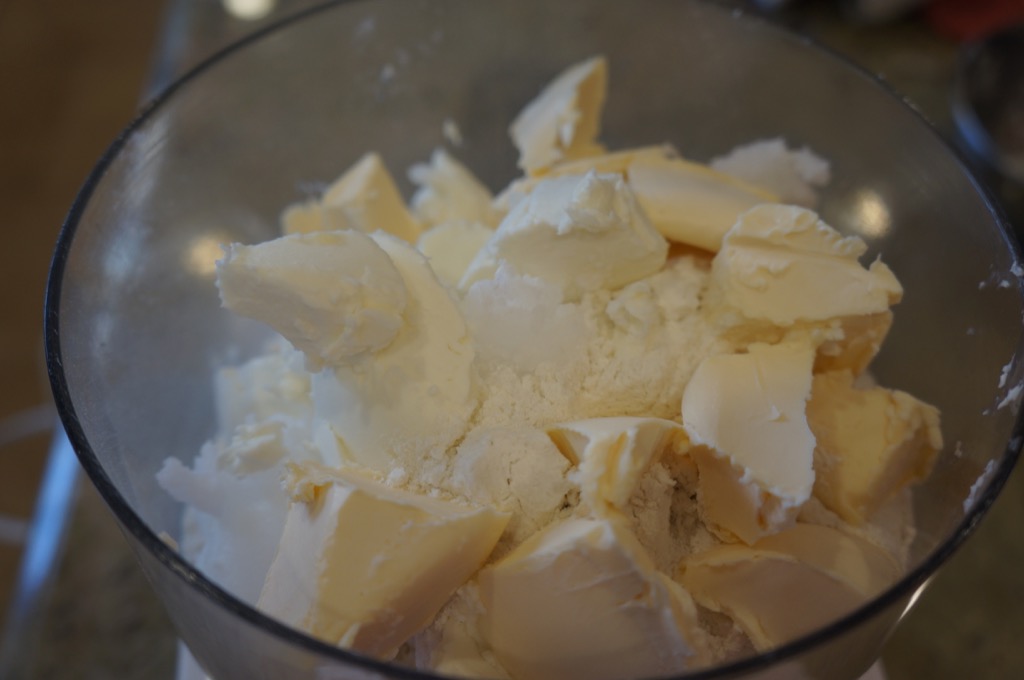
Let’s talk about measuring shortening for a minute. It’s a messy thing. The recipe on the back of the bag calls for 20 tablespoons total of shortening. If you convert 20 tablespoons to ounces, it equals 10 ounces. I learned that, because of the water content of butter, a measure say of a 1/2 cup of shortening does not weigh 4 ounces like its butter equivalent. Get the equivalents here on this post about how much shortening weighs. I now own a scale and find it much easier and less messy to weigh the shortening. For this recipe I used 240 grams of a combination of the three butter substitutes. I probably used about 90 grams each of the shortening and Earth Balance then made up the rest of the measurement with the coconut oil (closer to 60 grams)
If you want to buy a reasonably priced scale, this is the one I have. Note: I am an amazon associate and receive a teeny tiny portion of that sale at no cost to you!
Back to the recipe. So, if you are making a dairy-free pie crust and you want to weigh the shortening combo instead of using a measuring cup, use the conversion method. I measure in grams because it’s more accurate.
Once the fat is measured, place it in the freezer to get extra cold for about 5-10 minutes (quick: read to the next paragraph before you do this). My coconut oil and shortening are always at room temperature. Alternatively, you can measure and then put in the fridge the night before.
One more thing: make sure the pieces of the shortening are cut into smaller pieces. For example, as part of the measurement I used a stick of the soy-free Earth Balance. Before this goes into the freezer, I cut the stick up into smaller pieces. This really helps with distributing the fat into the flour. If you don’t do this step, the fat may not properly incorporate.
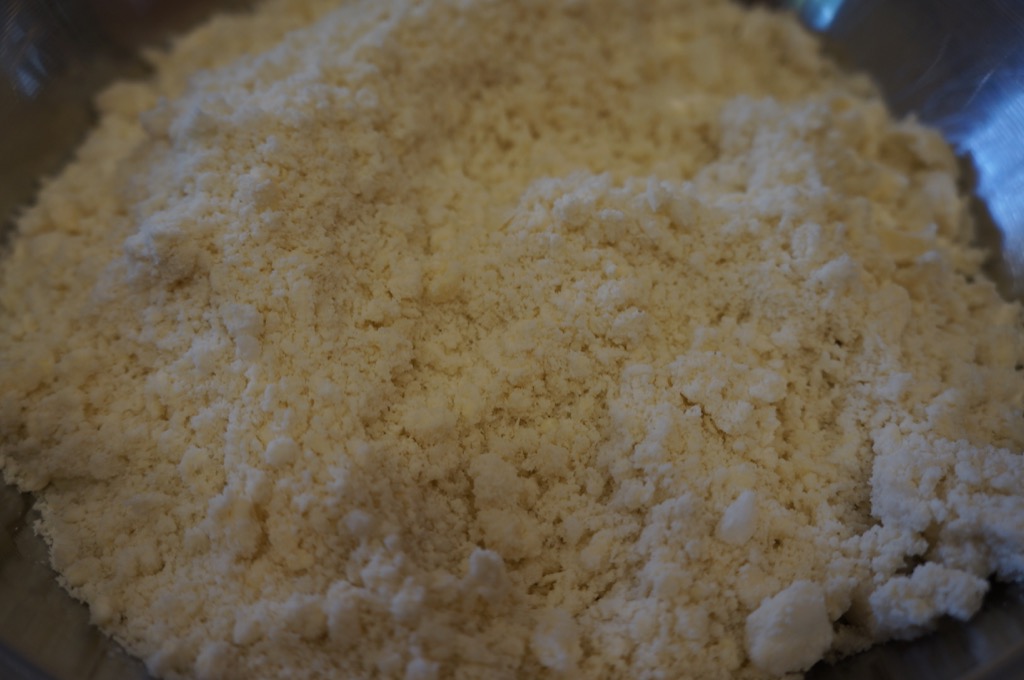
Once the shortening and fat are combined, it should look like grated parmesan cheese
MIX THE FAT WITH THE PIE CRUST MIX
Once the fat has gotten super cold, get everything else out: Bob’s Gluten-Free Pie Crust Mix, a food processor fitted with the metal blade (the most efficient way to cut the fat into the flour), ice cold water (a bowl of cold water with a few ice cubes), a large bowl, measuring spoons, and plastic wrap. I find letting it get a tiny bit soft helps. So 10 minutes in the freezer, then less than 5 minutes on the counter.
Place the entire bag of pie crust mix in the food processor. Place the cold fat into the food processor, making sure there are no big pieces. On the directions, it says to pulse 10 times for about a second for each pulse.
Here’s what I learned. When I took the shortening out of the freezer and it was super cold, it did not get cut properly in 10 pulses. When I put it in the freezer to get it cold but then left it out on the counter for about 5 minutes, it almost was fully cut in the 10 pulses. Bottom line: if you put the fat in the fridge the night before to get cold, you will probably be able to cut it properly in 10 pulses, maybe 15 total. If you use the freezer method, you might need to pulse it more than 10. The harder the fat is, the more pulses it will take. You need to use your judgement. If you see big pieces of the fat, continue to pulse.
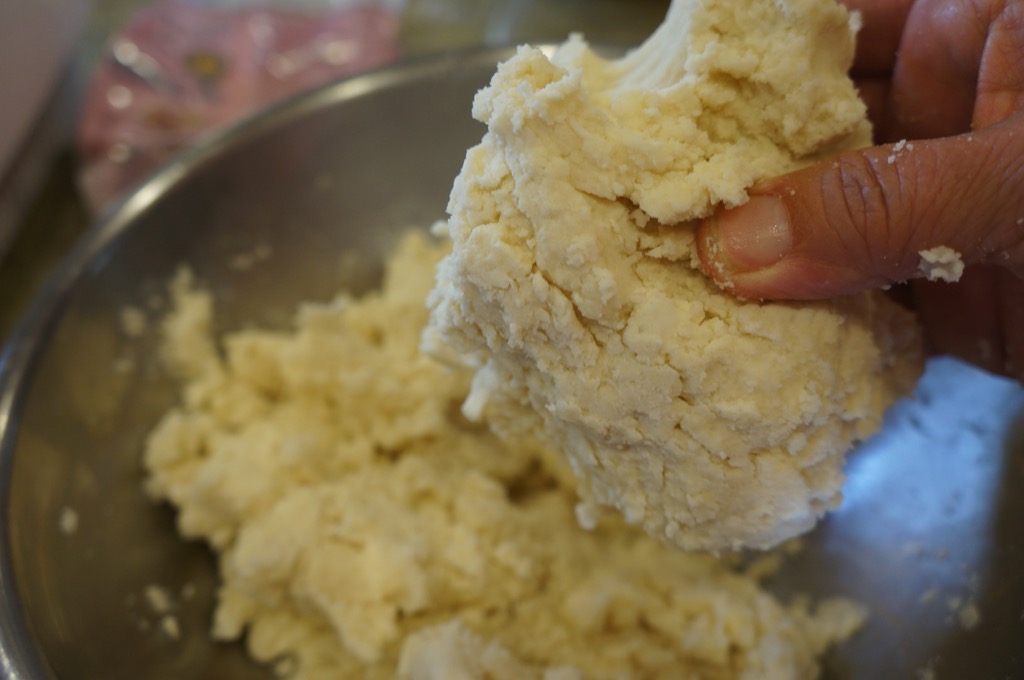
Your hands are your best tool.
ADD ICE WATER TO MIXTURE IN A BOWL
Next, and this is very important, transfer the mixture into a large to medium bowl. Do not try to mix this in the food processor. You need to be able to feel it. I also tried mixing it with a spatula. That didn’t work too well. Your hands are your best tool. Once the mixture is in the bowl, distribute (meaning don’t dump it all in one place) 6 tablespoons of ice water. Mix that together.
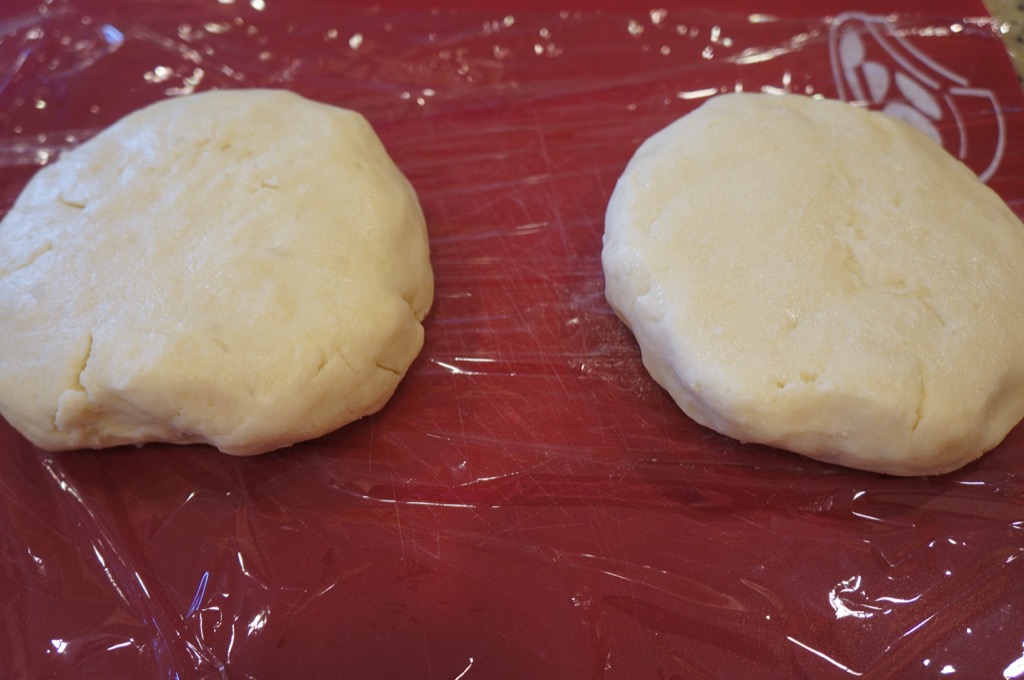
Form your dough into discs.
FORM CRUST INTO TWO DISCS
This is also very important: if the mixture does not hold together, add more water until it’s smooth. If there is not enough water, it will fall apart when you are rolling it. At that point, it’s much harder to fix. Make sure there are no cracks in the dough. This is something that as you do more than once will become easier. Divide the dough into two pieces and shape each into a round disc. Note: if you are making 1 pie in a deeper pan, divide the dough into two; 2/3 and 1/3 discs. You can save the smaller piece for another use.
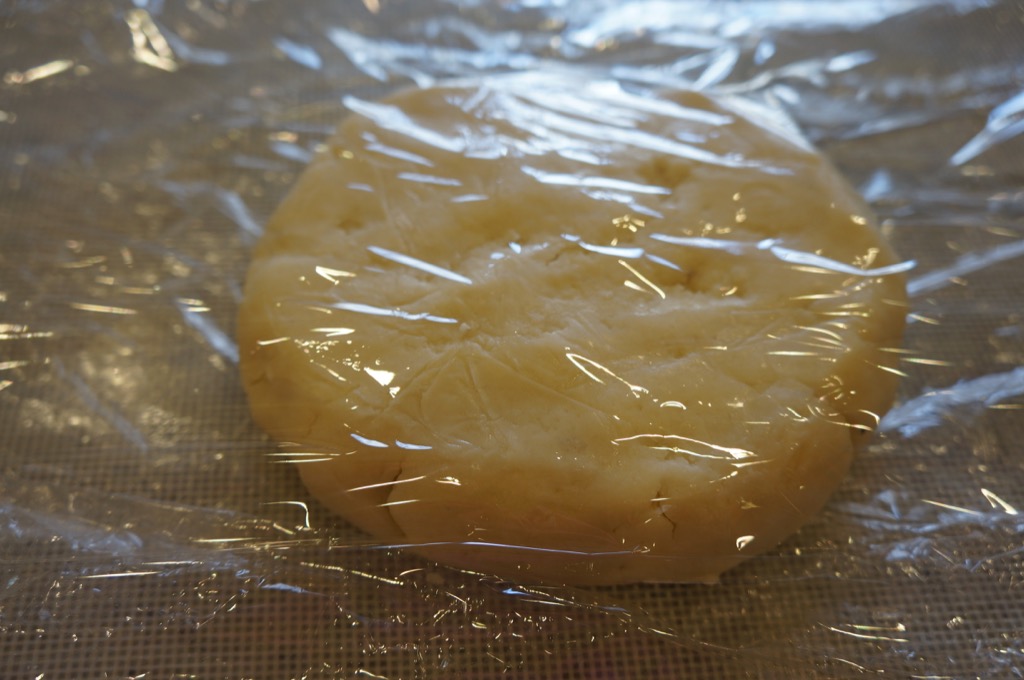
Let your discs sit for about 5 minutes outside of the fridge before rolling.
ROLL THE CRUST
This recipe makes 2 generous pie crusts; either a top and bottom or two bottoms. I almost always have leftover crust. I’ll get to that later. Keep the discs in the fridge for about an hour. You might be able to keep it for longer but the consistency of the dough might be affected.
While the discs are in the fridge, get out the rest of the pie filling ingredients, a rolling pin, more plastic wrap for rolling, and pie pans. Make the egg wash. I also preheat the oven about 20 minutes before I’m ready to bake to make sure the oven is nice and hot. This recipe can make 1 deep dish pie or 2-8″ pies in a less deep pan. If you make one pie, you will not need all of the pie crust. If you make two pies, the filling will not go to the top. Alternatively, you could make 1.5x the filling and have two well-filled 8″ pies.
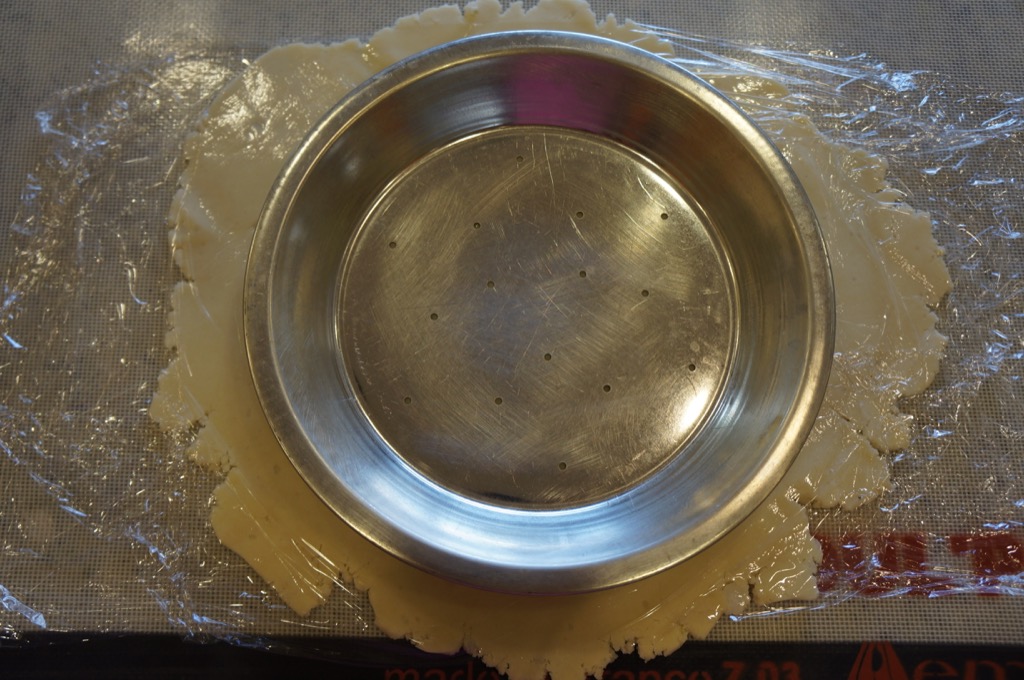
Place pie pan on top of rolled crust to estimate size
Take the discs out of the fridge and prepare the filling ingredients. Let the discs sit out about 5 minutes before rolling. Now, here’s where you have to follow the rules. Roll one of the discs of the dough between two pieces of plastic (or possibly in a large freezer bag). I have tried to do this with my rolling mat and tapioca flour; it resulted in a crumbly crust. Place the pie pan on top of the plastic to estimate how much more the dough should be rolled. I usually estimate there to be 2-3 inches all around.
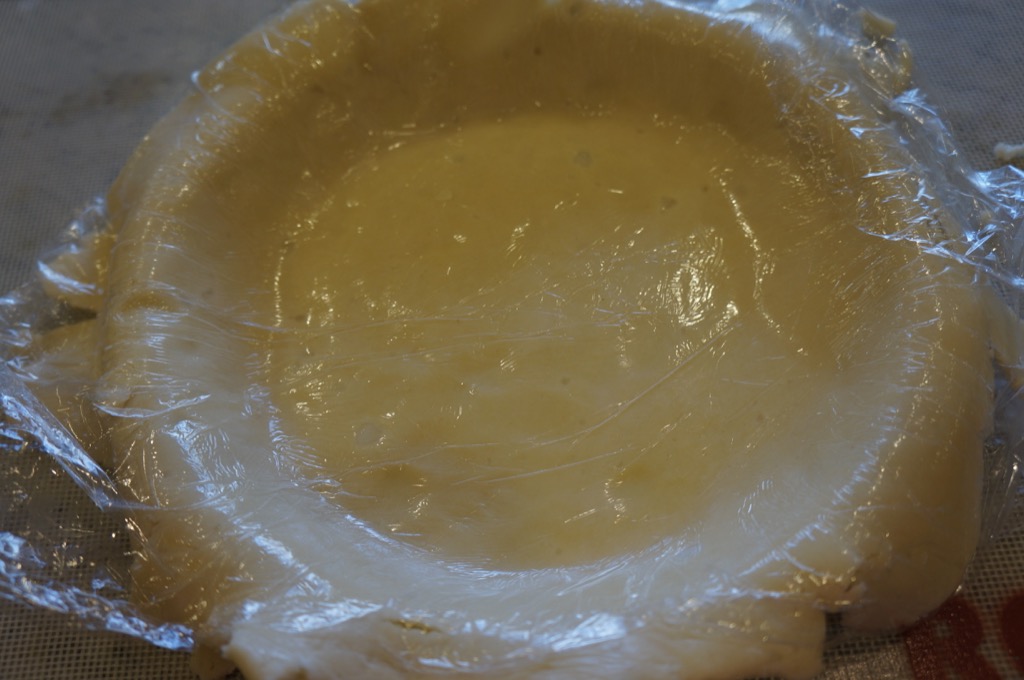
Flip pie crust into pan after rolling
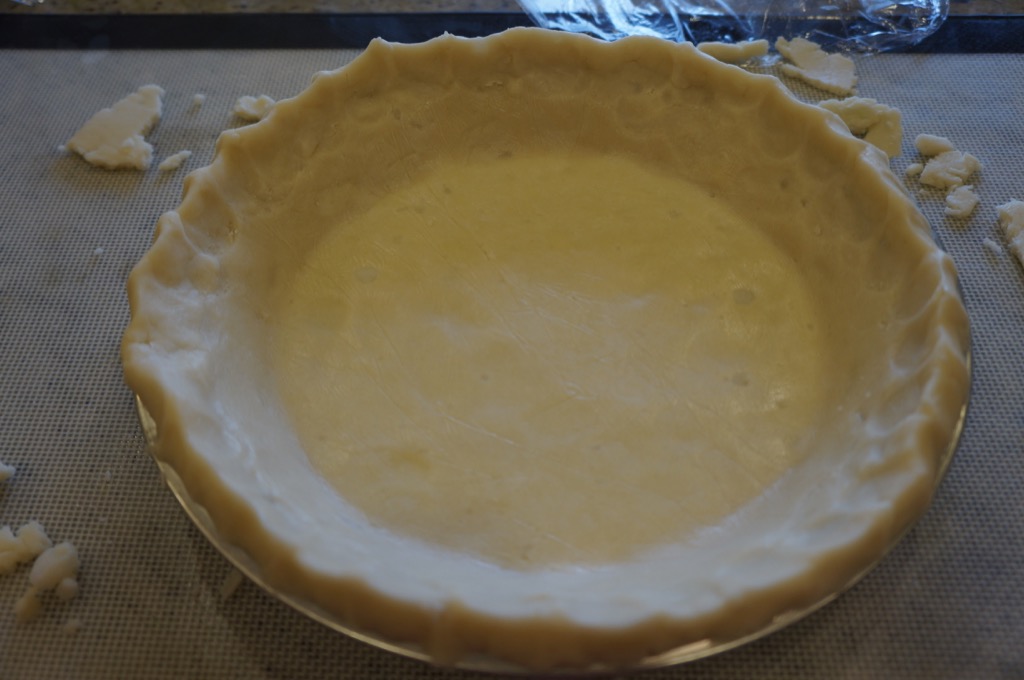
Once the crust is rolled out, remove only one of the pieces of plastic. Carefully flip the crust onto the pie pan and press into the pan. Remove excess dough and make a decorative crust on top with either your fingers or a fork. If the crust breaks, add small amounts of water to seal/fix. Repeat with second crust.

After crust is placed in pan, add filling then brush edges with egg wash
FILL CRUSTS AND BAKE
Divide pie filling evenly between two pies. Carefully brush crust with egg wash (this helps to brown the crust since there is no butter in it). Sprinkle some sugar on the crust as well. Place in the oven and follow the directions below. I like to place mine on a baking sheet to prevent spills or crumbs from going into the oven.
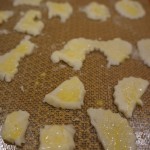
If you have leftover crust, roll out between plastic wrap, place on a baking sheet lined with parchment, and make designs like leaves or pumpkins. Brush with egg wash and sprinkle with sugar. This can be used as a decoration on top or even as a little cookie. They are delicious! This tray can go in the same oven as the pies, assuming you have room, for about 10 minutes or until golden brown.
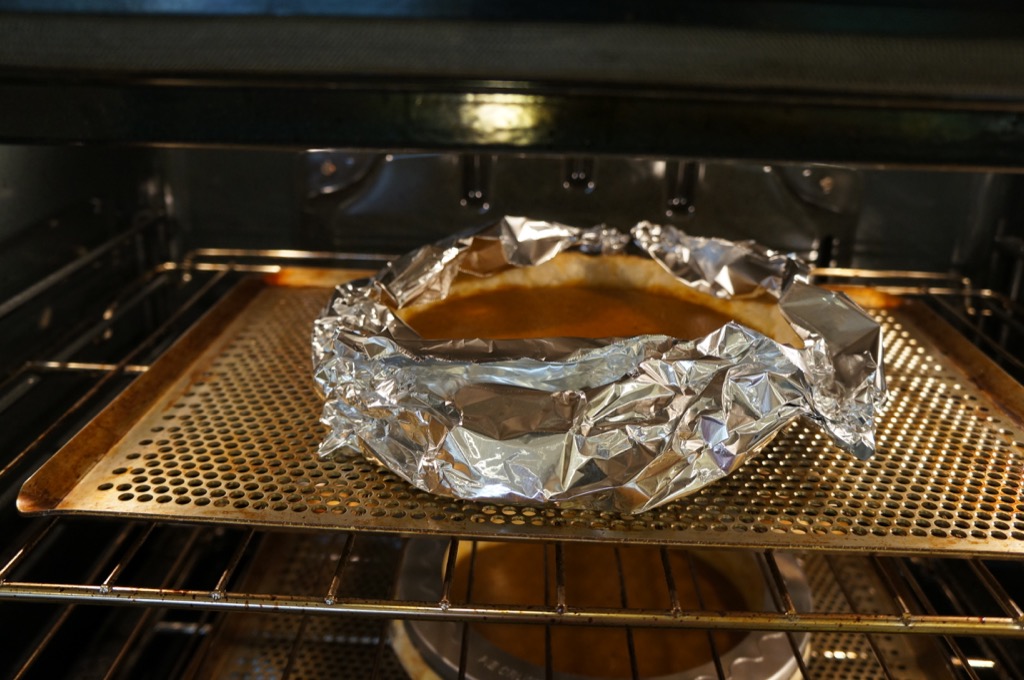
One the pies are baking, keep an eye on the crust. You may need to line the crust with foil halfway through the baking process if it starts to get too brown.
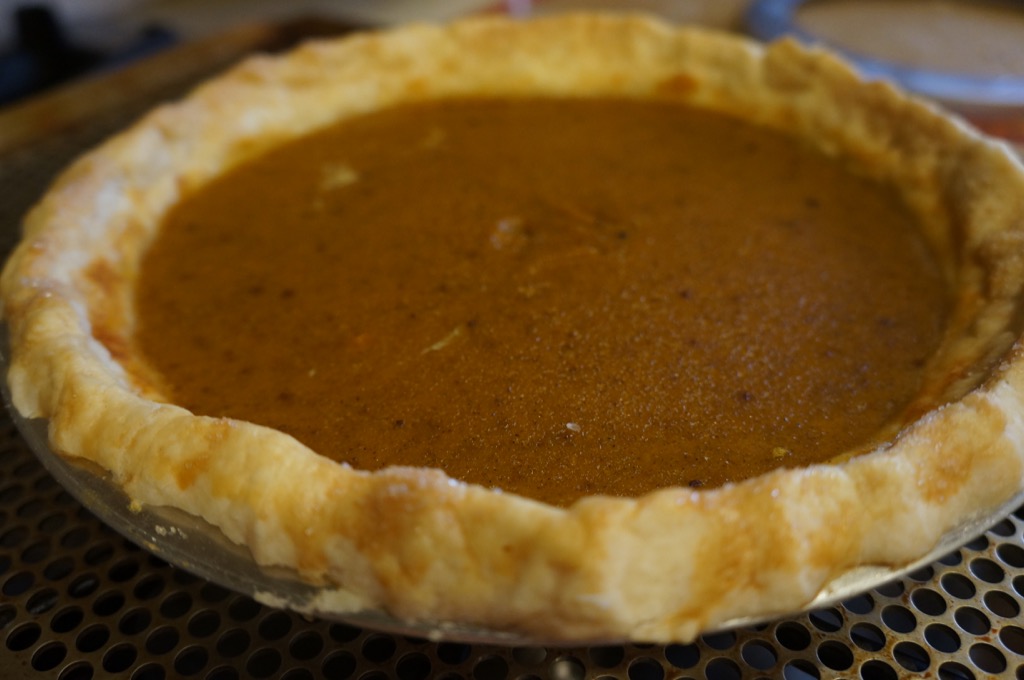
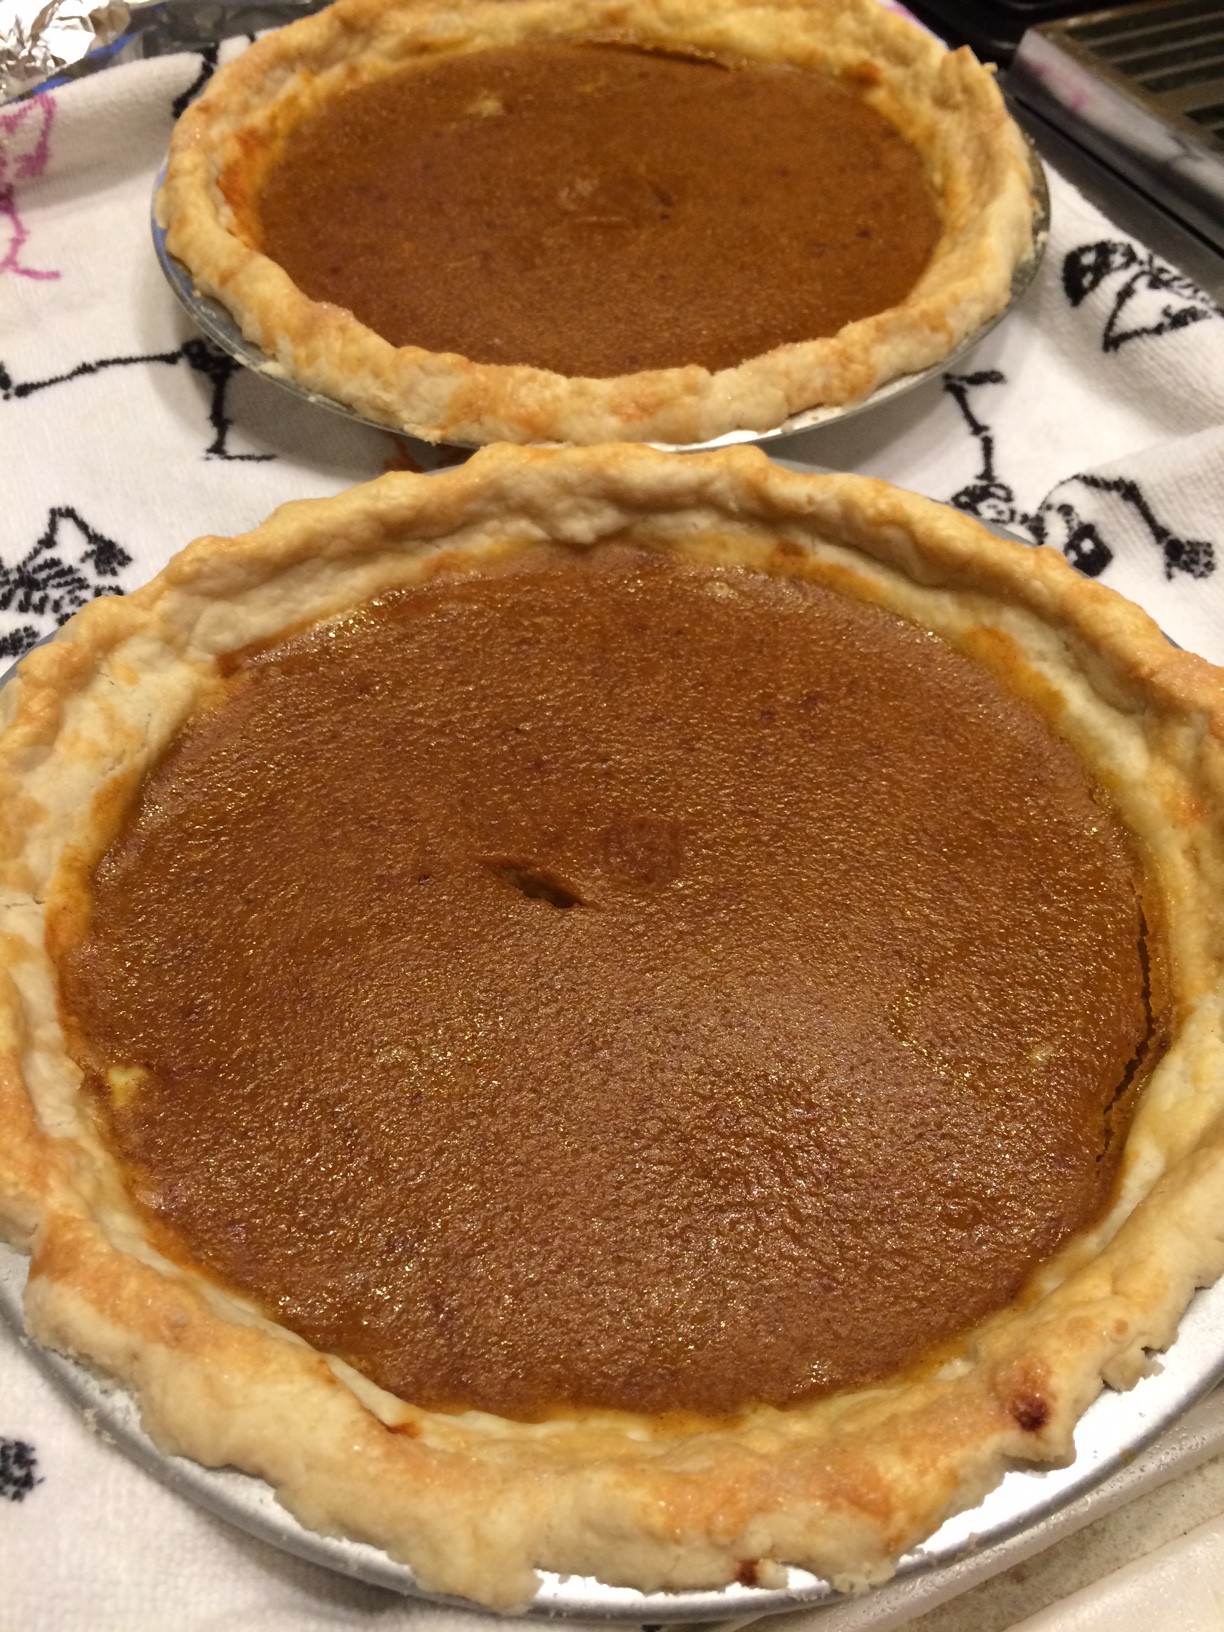
The pie is done when a knife inserted in the center comes out mostly clean. Let the pies cool at least an hour before cutting or before putting into the fridge. The pie crust is delicate but delicious so if it breaks off, just place it on the plate.
I served this pie to 6 adults and 6 kids. There were 2 small pieces left. When a child asks for seconds, you know you are doing something right. I really like this crust and will definitely use it again especially this Thanksgiving.
Phew! That was a lot of details but since I can’t be in the kitchen with you, this is your cooking lesson. Enjoy the recipe. I hope you love it!
Gluten-Free, Dairy-Free Pumpkin Pie
Recipe from The Warm Kitchen
Makes one 9″ deep dish pie or two 9″ regular pies
1 bag Bob’s Gluten-Free Pie Crust
20 tablespoons or 240 grams total of: vegetable shortening (like Spectrum), Earth Balance stick, and coconut oil (use less than 1/3 of the coconut oil)
6-8 tablespoons ice water
1 15-ounce can pumpkin puree (not pumpkin pie filling)
1/2 cup milk substitute
1/2-3/4 cup brown sugar or cane sugar 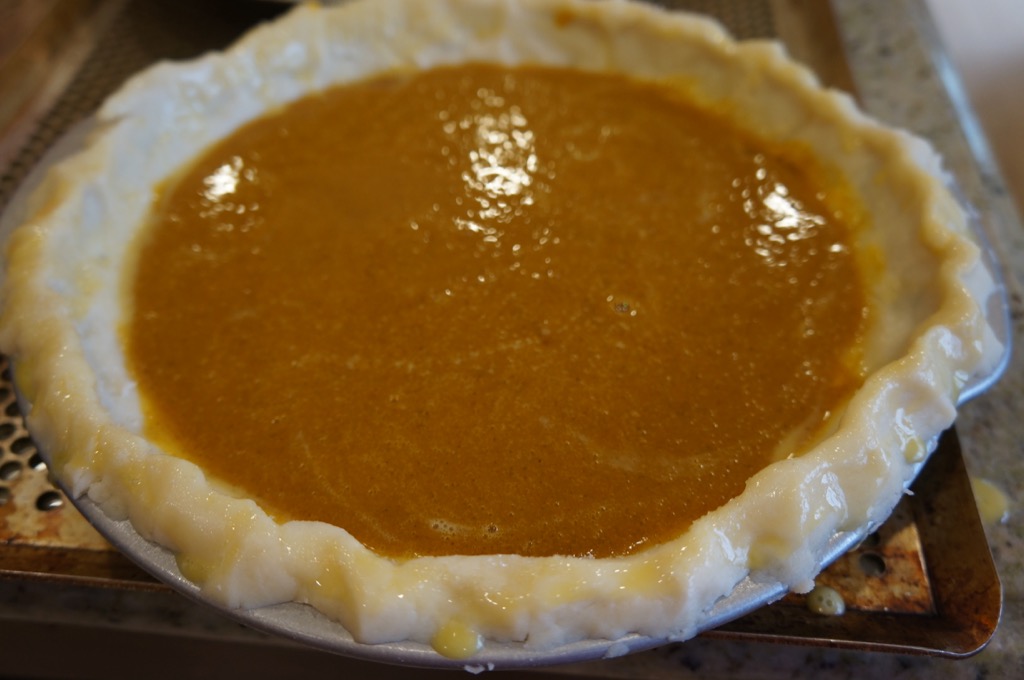
3 eggs
1 teaspoon cinnamon
1/2 teaspoon kosher salt
1/2 teaspoon ground ginger
1/2 teaspoon nutmeg
1/4 teaspoon cloves
Egg wash: 1 egg mixed with 1 teaspoon milk substitute or water, lightly beaten
White sugar
- Prepare crust. Shape into 1 or 2 discs, depending upon how many pies you are making (see details above).
- Preheat oven to 425°F.
- Remove pie crust from fridge and set aside. Mix filling ingredients in a large bowl.
- Roll out dough between two pieces of plastic to 1/8″ and place dough into pie dish. Cut excess with kitchen scissors or a knife. Reserve extra to make pretty leaves or pastry twists. Crimp edges of the crust with your fingers or a fork.
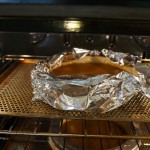
Line the crust with foil if it’s getting too brown.
- Pour filling into shell. Brush egg wash on the crust so it browns nicely. Sprinkle white sugar on top of this to make the crust a little sweeter and help with the browning.
- Bake 15 minutes, then reduce oven temperature to 350°F and continue baking 35-40 minutes until knife inserted in center comes out clean. If the crust browns too quickly, place foil around the edges of the crust (see photo).
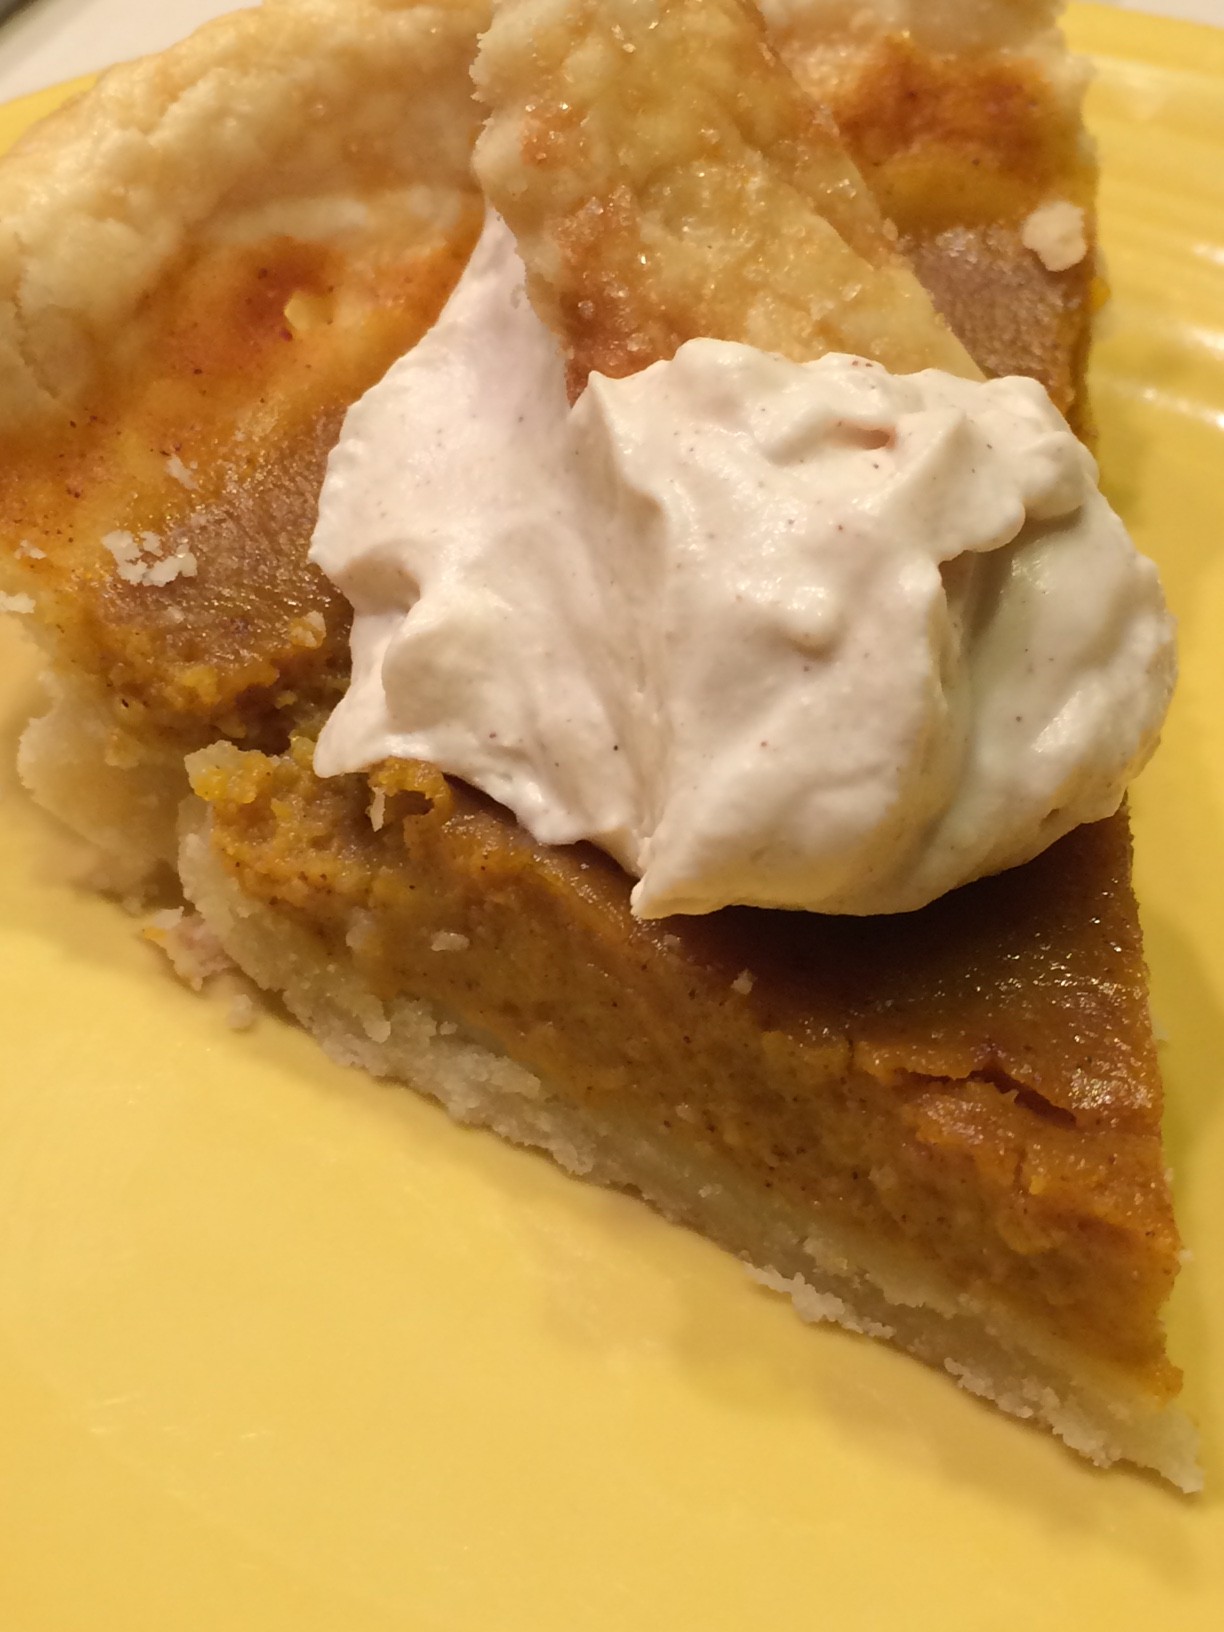
- Cool before eating. Crust might be crumbly so cut with care. Serve with coconut whipped cream.
Coconut Whipped Cream
One 15-ounce can full-fat coconut milk
2-3 teaspoons sugar or other natural sweetener
1 teaspoon vanilla or more to taste
Optional: a few sprinkles of ground cinnamon
- Place can of coconut milk in the refrigerator for at least 3 hours; overnight is optimal.
- Open the can of coconut milk. There will be a solid layer on top of coconut fat. Scoop this out and place in a large bowl or a bowl of a stand mixer. Do not include the liquid (you can drink this or use it in a smoothie). Drain any additional liquid from the bowl.
- Turn the stand mixer fitted with the paddle attachment or a hand held mixer to high speed and whip the coconut cream for 3 to 5 minutes or until it is light and fluffy.
- When the cream has soft peaks, mix in sugar and vanilla until incorporated. Taste and adjust if necessary.
- Use this as a topping for the pie when ready to serve.
**I received compensation for writing this review and post. Although this post is sponsored, all opinions are my own. I really do love it!
[…] version) Roasted Tomatoes over Mascarpone and Polenta Caesar Salad Butternut Squash Risotto Pumpkin Pie (gluten-free and dairy-free) Gluten-Free […]